Bootstrap Checkbox Label
Intro
From time to time the easiest details may possibly get pretty important-- most especially in case you come to need them. As an example just how do your site visitors communicate with the webpages you create specifying a simple Boolean act-- just yes or no concerning a number of the thoughts you should ask, exactly how they do consent to the conditions and terms or maybe line up a few of the achievable preferences they might possess. We most likely get past this without paying a lot of an attention to the feature accountable for such activities but the Bootstrap Checkbox Design is really a quite serious element-- one our forms can not really perform without.
Located in newest fourth version of the Bootstrap platform we are offered with the
.form-check.form-check-label<div>.form-check.form-check-label<label><input>.form-check-inputThe ways to work with the Bootstrap checkbox:
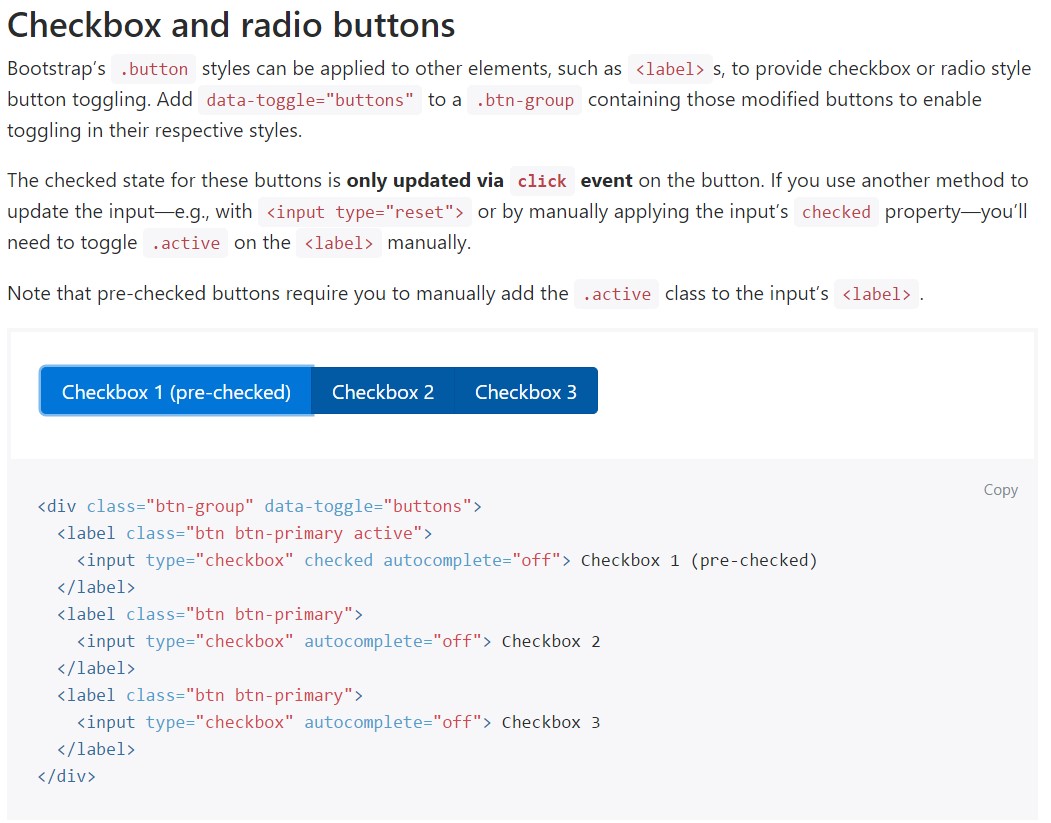
Bootstrap's
.button<label>data-toggle=" buttons".btn-group
<div class="btn-group" data-toggle="buttons">
  <label class="btn btn-primary active">
    <input type="checkbox" checked autocomplete="off"> Checkbox 1 (pre-checked)
  </label>
  <label class="btn btn-primary">
    <input type="checkbox" autocomplete="off"> Checkbox 2
  </label>
  <label class="btn btn-primary">
    <input type="checkbox" autocomplete="off"> Checkbox 3
  </label>
</div>
Sometimes we want the checkboxes to arrive within our forms without the customer actually having the ability to bring any activity selecting them-- that is really where the disabled option appears.
If you want to disable properly a checkbox in Bootstrap 4 working with the common HTML attribute
disabledIf you like the idea and really desire to carry this out you really should specify the
.disabled.form-checkAnother case
If utilizing checkboxes, wrap them in a
<label>.custom-control.custom-checkboxEmploy
.custom-control-input<input>In addition work with two
<span>.custom-control-indicator.custom-control-description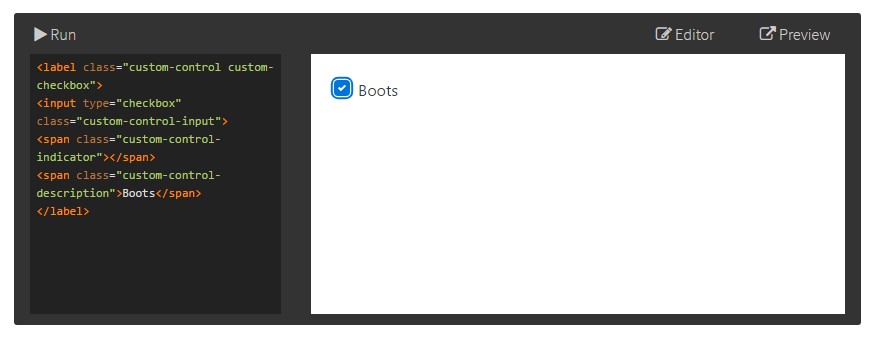
<label class="custom-control custom-checkbox">
<input type="checkbox" class="custom-control-input">
<span class="custom-control-indicator"></span>
<span class="custom-control-description">Boots</span>
</label>
Bootstrap Checkbox Input forms
Default radios and checkboxes are raised upon with the help of
.form-checkThe disabled class is going to at the same time lighten the text color tone to help reveal the input's state.
A fresh stuff for the Bootstrap edition 4 framework is the initiation of the so called custom-made form features. These are actually the very same elements we are used to in practicality yet designated way more beautiful and also in the Bootstrap method. Utilizing them you can surely bring in fascinating spice and style to your material through just selecting a few special classes to the commands you feature in your forms.
If you want to utilize customized checkboxes wrap them within a
<label>.custom-control.custom-checkbox<input>.custom-control-input<span>.custom-control-indicator.custom-control-descriptionFinal thoughts
That's practically all that you require to do in order to add a checkbox component for your Bootstrap 4 powered web site and add in some customized flavor to it adding it a beautiful appeals. Currently everything you ought to do is repeat the practice till you've inspected all the checkboxes needed are actually on the web page.
Check out a few on-line video training about Bootstrap checkbox
Related topics:
Bootstrap checkbox approved documents
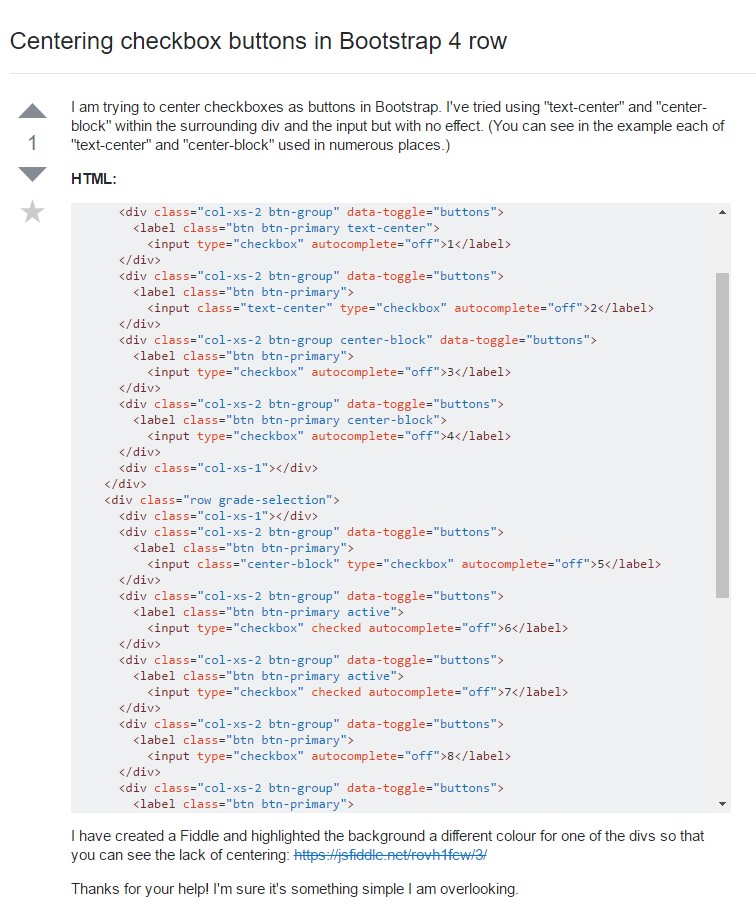
Centering checkbox buttons in Bootstrap 4 row
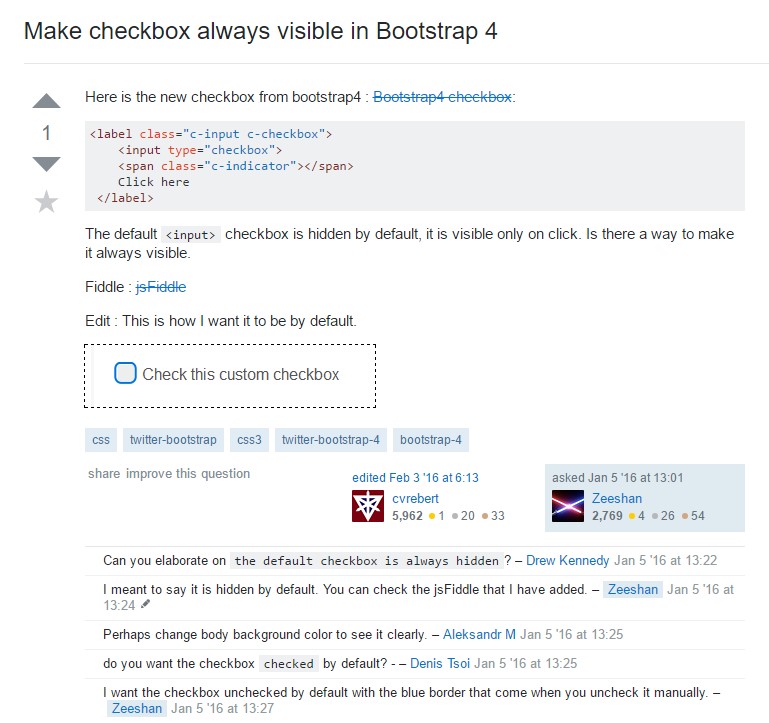
Make checkbox always visible in Bootstrap 4